Giant Papercraft Head
Posted on Mon 01 November 2010
The work halloween party each year is impressive - I work with a bunch of immensely creative and talented people, and the costumes are amazing. I thought that this year I might at least try to keep up with the pace. Last year I saw the brilliant papercraft portrait from Eric Testroete and decided to have a go myself. It isn't the most brilliant build (Eric's work sets the standard) but I got a bunch of questions about it so I thought it'd do to write up a quick tutorial on it.
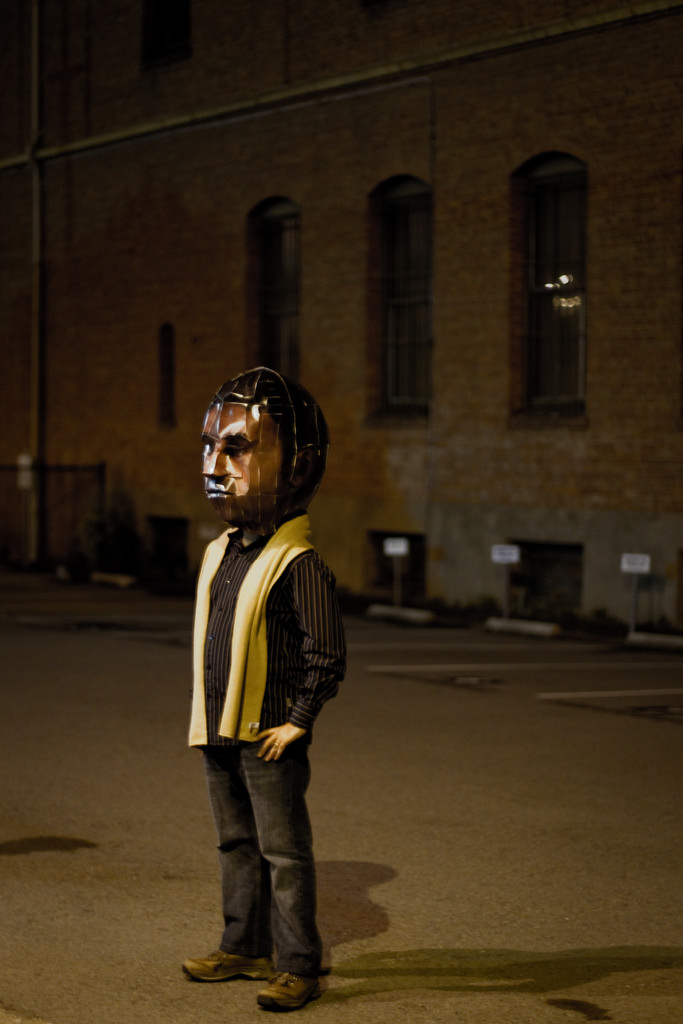
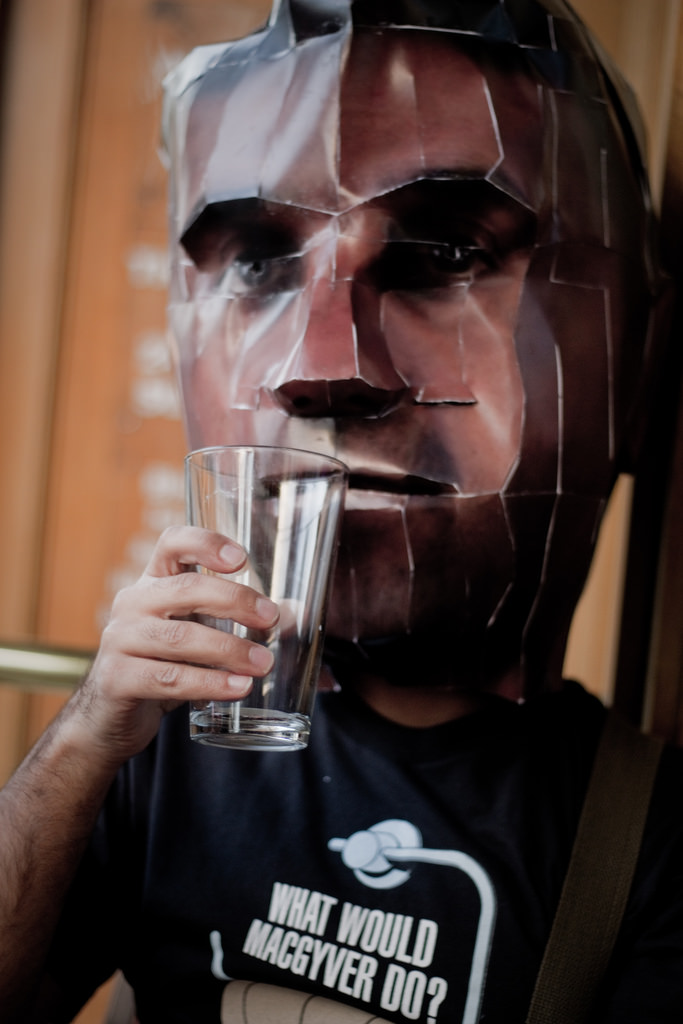
Photo reference
To make this work, you're going to need to start with two photos of yourself, one from the front, and one from the side. Take it without glasses and preferably with a simple hairstyle. Good, even lighting here is important - don't do like I did and have a shadow on one side of your face - the lighting should be soft and even all around.
Line up and resize the two images so that the head size and eyelines match in both. Square crop them.
Modeling a head in a 3d app
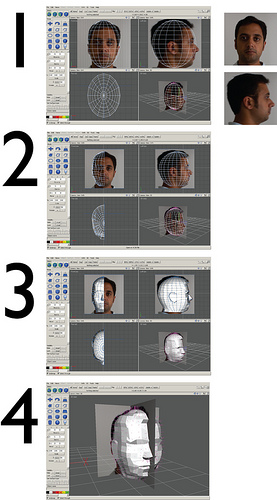
You'll need a basic 3D modeling program to make a low poly head. I used ac3D; it's small, simple and has a 14-day trial version. However, any old app will probably do the trick. Keeping the number of polygons low is critical - keep it below 200, with maybe 500 max. If it's any higher, you will go completely insane cutting and folding and gluing.
1) Create two plain squares and arrange them so that they are perpendicular to each other, centered around the origin. Apply a texture to these using the two photo references from above; this will be your reference to work from for creating a head. Create a low-polygon sphere (12 segments or less) made of quads centered around the origin. Scale and squash it so that it approximately matches the shape of your head and switch to a wireframe view of it.
2) Select the vertices that roughly line up with the front part of your face and flatten these a bit (human faces are a bit flatter at the front). Now, delete the faces from the left-hand side of the sphere (left or right, it doesn't really matter). Also delete the bottom faces - you'll need an open hole at the bottom to model your neck. The real work begins now - you'll need to move individual vertices to match the shape of your face. If you need to get a bit more detail in some areas (e.g. around the lips, eyes, nose), select the faces that are close and subdivide these. To get the required level of detail.
3) As you get towards the end of the vertex twiddling process, switch between flat and wireframe views to tweak the shape and make sure it looks approximately right.
4) Once you're reasonably satisfied, mirror the head shape to get the other half back. If you want to introduce any asymmetrical parts (e.g. hair partings etc) go ahead and keep on tweaking vertex positions. Once you are happy with how it looks, export the head mesh (I prefer to use wavefront obj files).
UV Mapping
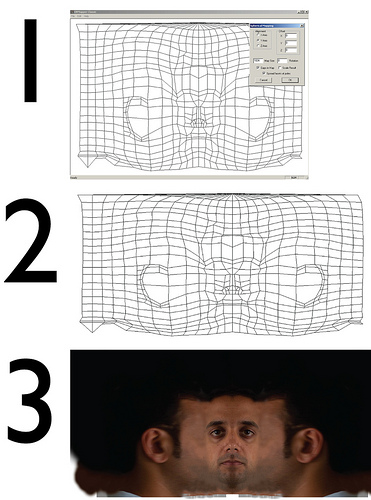
Next you'll need to make your object ready to accept texture maps. I use UV mapper classic as again, its free, small and quick.
1) Load the head mesh in uv mapper, and unwrap the mesh using spherical mapping. If it works right, what you should see is a texture with your face roughly in the middle. If this doesn't work, adjust the alignment and the rotation until you get something that looks roughly like the image above in step 1.
2) Export the texture map to a file and save the re-mapped mesh out to disk. There's no need to make the longest edge of the texture map any bigger than 1024 pixels as that is the maximum that pepakura (the mesh unfolder) can handle anyway.
3) Using your two photo references, in photoshop layer on the front and side pictures to create texture map. Match the features on your face with the features on the texture map as closely as you can.
Mesh Unfolding
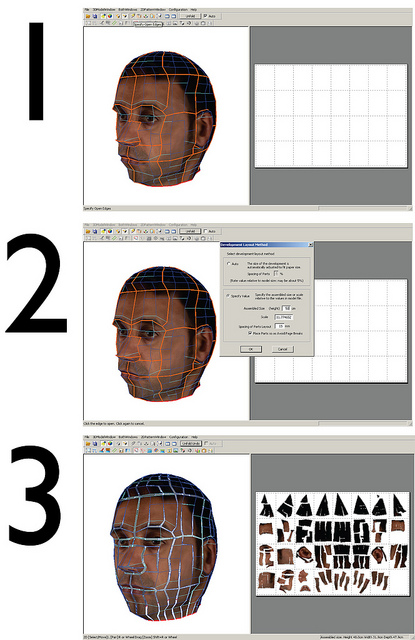
The next tricky bit is creating a mesh unfolding in paper. I use pepakura designer.
1) Load the mesh into pepakura designer, and apply the texture (under the '3DmodelWindow' menu, I think) generated in the previous step. Using the 'specify open edges' tool, cut the head into manageable size chunks - around the circumfrerence I split it into eight segments, and top to bottom into four. This is to make assembly a bit more structured and a bit easier.
2) On the top bar, uncheck 'auto' and hit 'unfold'. Select 'specify value' and pick a size. I found that 50cm (about 20 inches in the imperial units) worked for me; I wouldn't recommend going any smaller than this.
3) When the unfolding is done, group the pieces so that parts from each segment are all on one page each. This will make managing the pieces for assembly much, much easier.
Printing and Assembling

I'd recommend printing out the pages onto medium card stock; this is easy to cut but stiff enough not to collapse under its own weight.
Go to each page, and assemble each segment using PVC glue. This will take ages, depending on your level of experience. At this stage, you'll appreciate having kept the polygon count low - the more edges you have to cut and glue, the more insane you will become. Take the set of segments for the front half of the head and assemble these, and do the same for the back half. You should now have two slightly wobbly halves for the mask.
Take some stiff wire and loop it around the crown of your head. Tape together the loop at the point where the wires cross. Wear the loop like a crown and place the front face of the mask where you'd like it to sit; note where the remaining bits of wire from loop touch the front face and tape these to the mask.
Now attach the back half of the mask now to the front (I used tape here instead of glue). You'll need to cut small eye-holes at eye height; I'd recommend making these as flaps as they can be folded down for when you'd like a photo taken.
Results
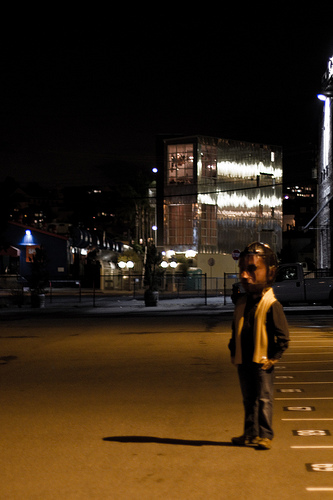
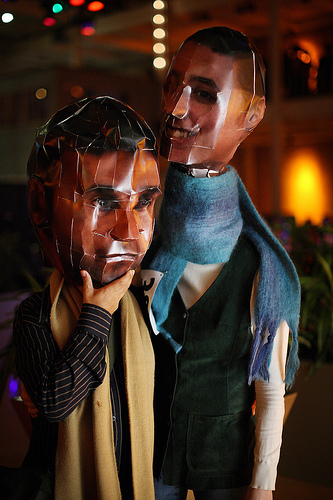
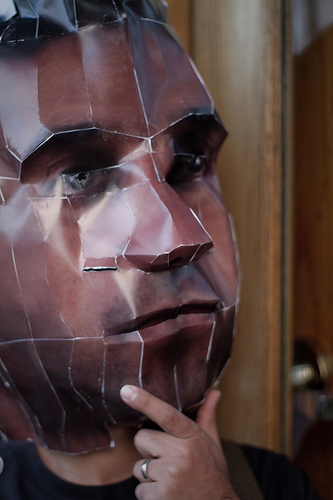
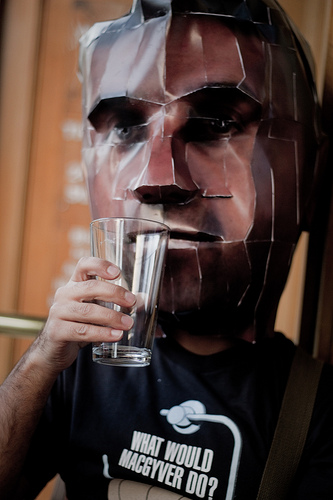
made a papercraft head for both myself and my wife; the results are below. Polygon count here is critical - my wife's head was about 200 polygons, and took a few hours to assemble. My head was easily about 500 polygons, and it took nearly a week worth of evenings to get done, so I'd say for sure that a modest increase polygon complexity leads to a significant increase is assembly difficulty. Part of that comes from the fact that you'll have to deal with more edges - more to cut, more to glue.
Given another chance to do this, I think another thing to fix would be to properly acquire the source images and colour-correct the print - these heads were definitely printed out too dark. Also, I'd use matte paper instead of glossy - the shininess definitely distracts from the build.
