Shooting VR180 using a portable rig
Posted on Thu 23 August 2018
Introduction
For my day job at Adobe Research I've been researching tools and workflows for processing VR-180/3D-180 video. Early development has been dominated by high-end, cinema-grade rigs but there's an unaddressed, consumer-grade market that is emerging. To get a better idea of this, I've been getting out and about shooting with these new rigs.
I wanted to see if it's possible to create a casual, cheaper and portable kit for VR180 filming. Earlier this month I traveled to Vancouver for SIGGRAPH 2018, and I documented my experience. The footage is best viewed in a headset but seems to work well enough on mobile and desktop.
Results
Links: Facebook, youtube, download for sideloading.
Observations
Tripod or not?
Part of the experiment was to evaluate if hand-holding the camera would be acceptable; current protocol for immersive cameras emphasize locking-off the camera on a tripod. To my surprise, if an attempt is made to keep the camera relatively still then the shots are acceptable. In tight spots where tripods are inappropriate or disallowed it's good to have a handheld option. All that said, noticeable camera translation does seem to make the viewer queasy (see: the shot of the lightfield camera in the video).
Sound
Sound capture and mixing for VR180 is a somewhat complex and involved process; HQ mixing is a big topic and I'm going to address fully it in another post. For the subject matter I was shooting - either subjects in front of the camera or narration over a scene - the primary audio came from a position in front of the viewer. I mixed in the ambisonic audio from the H2N as background fill. When I needed cleaner audio (e.g. for an interview) I used the earpods mic as a closer-to-the-subject source (this really should be handled via a lapel mic, of course).
Sync between the sources was handled via a simple set of finger snaps at the start of every shot; luckily the camera itself has on-board audio recording and this served as the timing signal master for syncing the audio.
Staging
There were a couple of end goals here that shaped the decisions for staging. The main driver was to produce a somewhat conventional what-I-saw-at-a-conference video, after that was good presentation in stereo for viewing in a headset and for good presentation monoscopically in a 'magic window' for mobile. I explicitly wanted to avoid re-rendering the video for other screens - the same footage should work everywhere.
For stereo, I worked with the established convention of keeping subjects about 1.2-1.5m (4-5ft) from the camera; for establishing shots I emphasized stereo cues by framing only on mid- to background elements to establish scale and space.
For constructing scenes that worked well in-headset as well as on mobile/desktop, I staged for the central 90-degrees of the frame, especially with human subjects. This simplifies the workflow and decision-making; the viewer then doesn't have to work to view the footage but is still immersed and if something breaks the frame then its an effect.
Another unusual observation was that a new protocol is probably needed for interviewing subjects. Conventionally interviewees look at the camera for connecting to the viewer; however, in-headset if the interview subject is closer to the camera (<1.2m, 4ft), looking directly at the viewer it quickly veers into creepy. As such, it's important to stand a bit further back from your interviewee, and possibly instruct them to switch between looking at you and the camera. This will need further investigation.
The rig
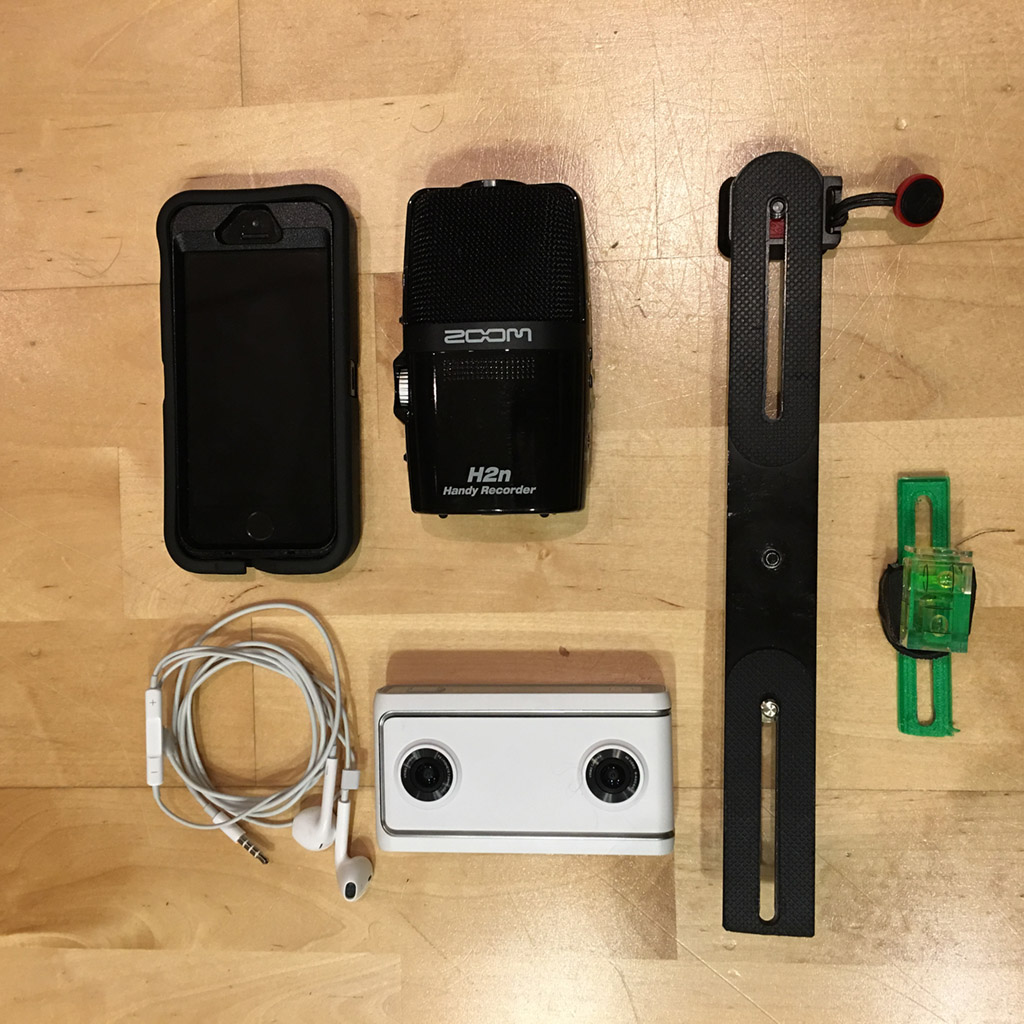
Unpacked
 The buildout for the rig is pretty minimal - pictured above is:
- For the VR180 camera: a Lenovo Mirage
- For ambisonic audio, the Zoom H2N
- For recording close-up clean audio, an iPhone with supplied earpods - the mic is used to record the voice record app
- A sawn-off offset plate to move the phone past the legs of a tripod. The end needed to be sawn off to prevent it intruding into the field-of-view of the camera
- A two-axis level in a 3D-printed bracket to attach it to the plate
- (not pictured, optional) A tripod
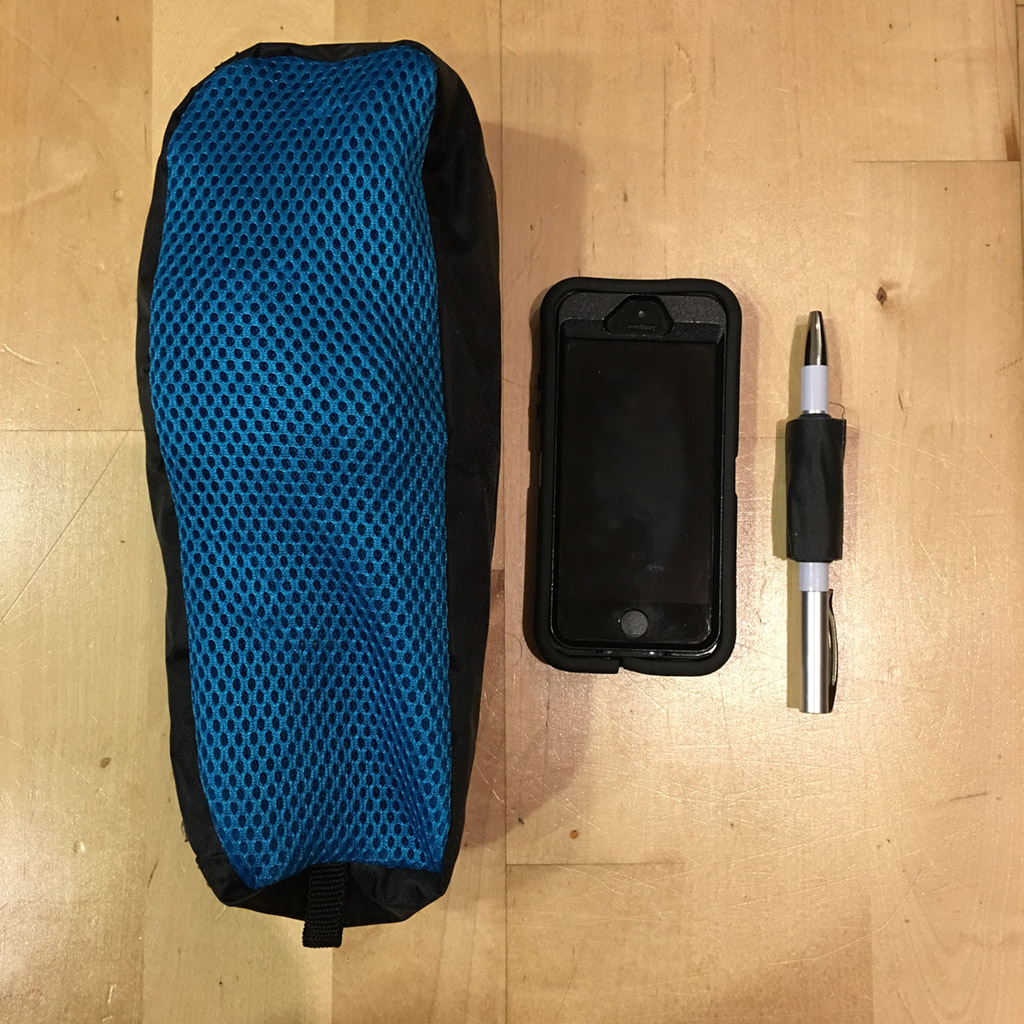
Packed
 This packs neatly into a long padded pencil-case, along with space for gaffer tape :]
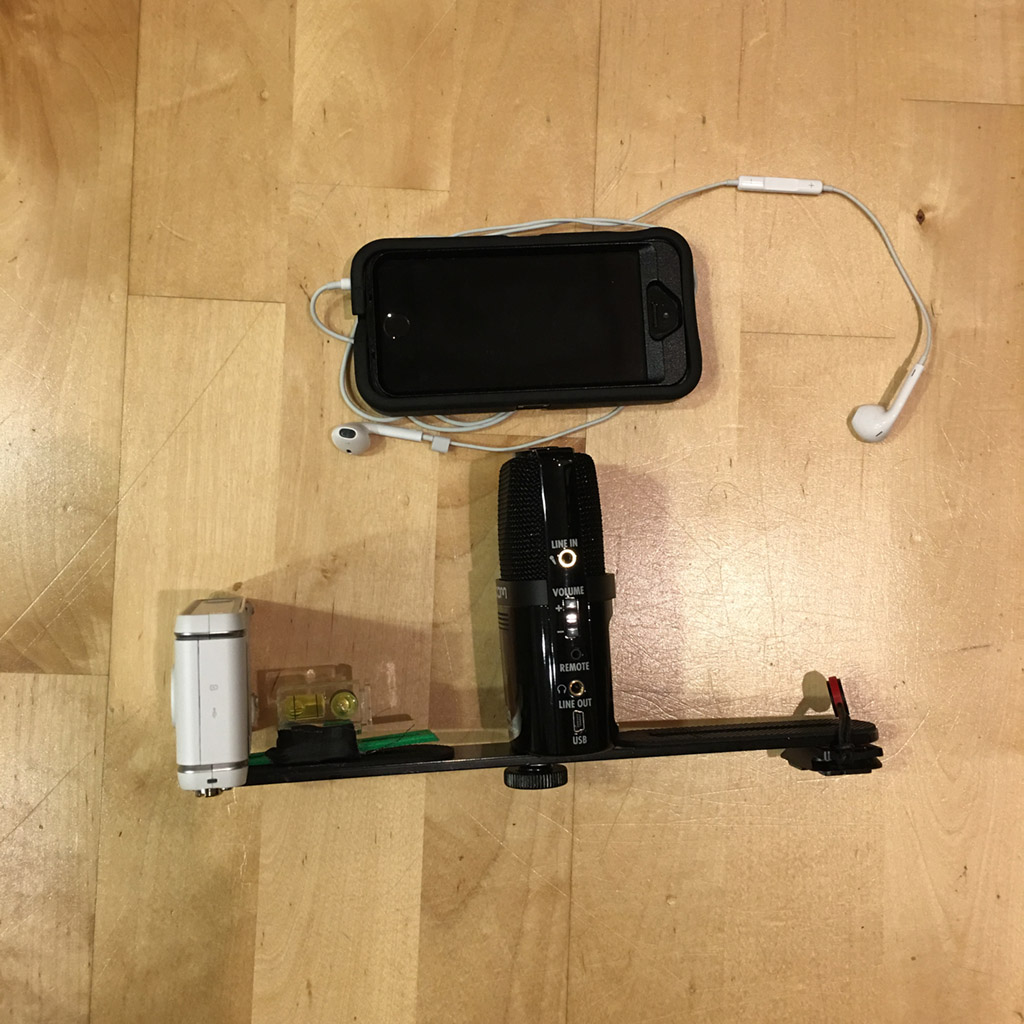
Rig assembly
 The microphone sits behind the camera on the offset plate; the camera goes up the far end (note the plate is sawn-off to end before the camera front) and a tripod mounting plate is attached to the other end.