Tilt-shift, a DIY guide - part 4, DIY tilt-shift lens examples
Posted on Sun 04 July 2010
Choosing a DIY lens design
Your choice of DIY lens design should be driven largely by what you'd like to do with it. Below is a table that enumerates some of the choices, but it is by no means a limiting factor - experiment with the lenses, and you'll be pleasantly surprised by the range of effects that are possible.
| Shooting style | Attributes | Lens |
|---|---|---|
| Free-form | Compact, portable | 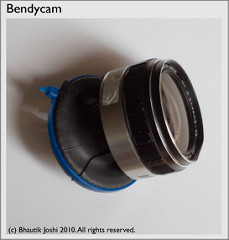 |
| Free-form | High-quality, large tilt-shift movements | 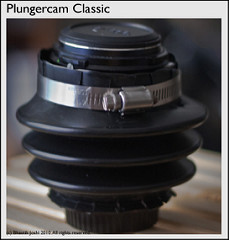 |
| Fixed | Compact, portable | 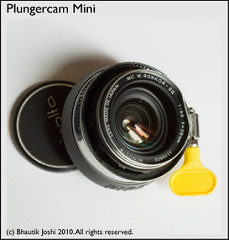 |
| Fixed | High-quality, large tilt-shift movements | 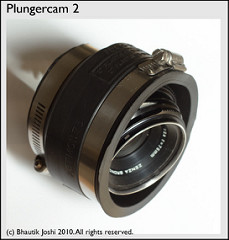 |
Bendycam
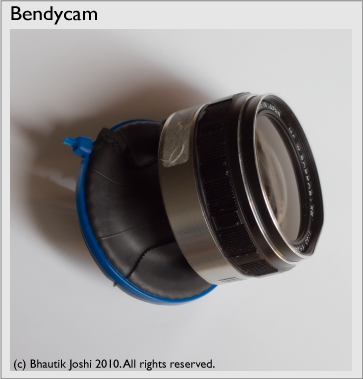
Bendycam is a selective focus DIY lens that is suitable for free-form shooting. While looking through the viewfinder, the photographer has to adjust the lens into position by hand. This allows for very fine control of the placement of the selective focus plane; however, because each shot requires placing the lens by hand, each shot is more-or-less guaranteed to be unique. Additionally, this design also allows for significant controllable shift of the lens as well as tilt.
Bendycam is based on the design originally proposed by Johnnyoptic, who has built a series of beautiful DIY tilt lenses with an elegant, compact take on the bellows mechanism which uses bicycle inner-tubes to couple lenses to a lens-mount.
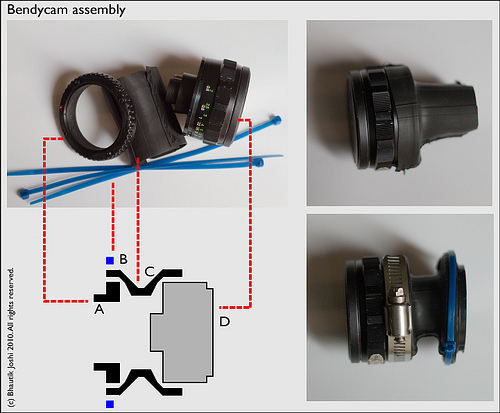
As shown in the bendycam assembly diagram above, the bendycam itself is made of only a few parts. A is simply a camera body cap, on top, which has the centre drilled out of it (on eBay for US$3). B are a few cable ties; if a single tie isn't going to be long enough then you may need to chain a couple together (about US$1 from a hardware store). C is a short section (roughly 10cm, or 4 inches) of bicycle inner-tube - you want to get as wide a diameter as possible (you can pick up used inner-tubes for free at pretty much any bicycle shop). D is a used 35mm lens with the focusing mechanism removed (see lens modifications) - in this case, a 28mm Minolta ($10, from eBay).
The first step is to preset the lens focal length to infinity, as this may be difficult to change once the lens is assembled. Next stretch 2-5cm (1-2 inches) of the inner-tube around the back of the lens, taking care not to tear the rubber (top-right of the assembly diagram above). Take the body cap end, and insert this into the free end of the inner-tube close to the end. Align it so that it is parallel with the rear of the lens (bottom-right of the assembly diagram above). Take the cable ties, and apply these tightly around the section of the inner-tube that covers the body cap. If needed, you can also use more cable ties (or a pipe clamp) to secure the inner-tube section that wraps around the lens as well.
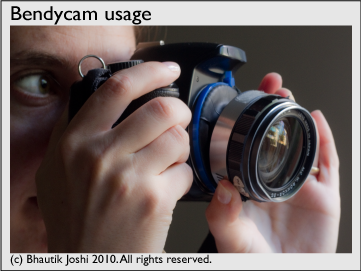
The bendycam is surprisingly intuitive to use (not to mention extremely fun!), and it's likely that first-time users of it will not have come across anything like it before. Focus is controlled by simply moving the lens by hand; I'd highly recommend just squashing the lens close to the camera body and moving it outwards while tilting the lens in different directions to experiment with how it works (again, be aware of where the lens is and don't bump it into the mirror!).
Although this is a manual lens, the level of control offered for focus in free-form shooting is, as far as I have found, unparallelled. While initially this lens takes a bit of getting used to, it offers the ability to generate some pretty unique-looking results. Most of all, it's fun to use, and there's something satisfying about taking a shot and knowing that you'll never be able to make it exactly the same way again.
Plungercam mini
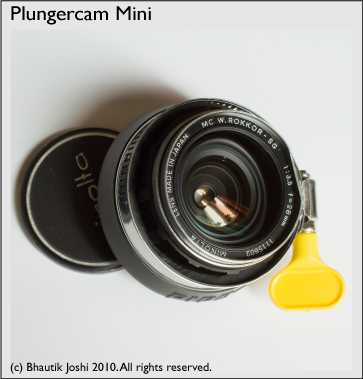
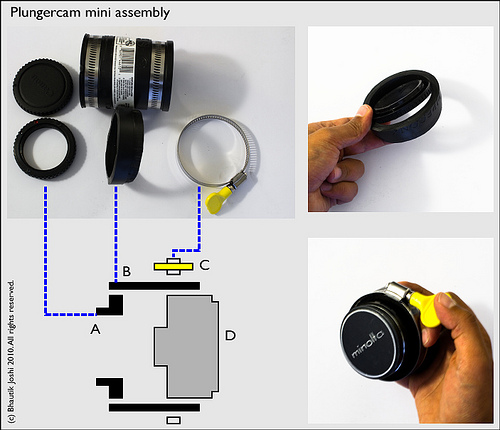
Assembly of plungercam mini is relatively simple. On the left of the assembly diagram above, the four basic components of the lens assembly are indicated. A is simply a camera body cap, on top, which has the centre drilled out of it, bottom. These can be found on eBay for US$3. B, on top, is a 5cm (2 inch) pipe coupling, easily available at a hardware store, and cost about US$2. Cut off a short length of it, and make sure it is long enough to house the lens comfortably (bottom). In practise, for the lens I was using, I found that 3cm wide (just over an inch) was sufficient. C is a 5cm (2 inch) turnkey clamp; again, easily available from a hardware store, and a pack of two will set you back about $2. In the diagram, D, like with the bendycam is a used 35mm lens with the focusing mechanism removed (see lens modifications).
The body cap should fit tightly inside the cut-off piece of pipe coupling; as the first assembly step, put it into place (top-right of plungercam mini assembly). Next, slide the lens into the other end of coupling and the turnkey clamp on the outside of the coupling, and the lens is assembled.
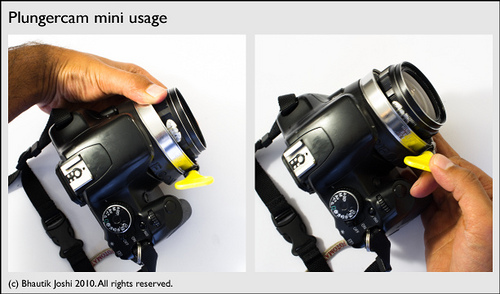
Usage of the lens is relatively simple. When approaching the subject, loosen the turnkey clamp so that the lens easily turns in it's housing. Looking through the viewfinder, you should easily be able to hold the camera with one hand and freely manipulate the lens with the other (see left of plungercam mini usage). In the case where you are shooting video, you can set the lens to the desired position and re-tighten the clamp so that the selective focus remains the same while you are shooting.
Plugercam 2
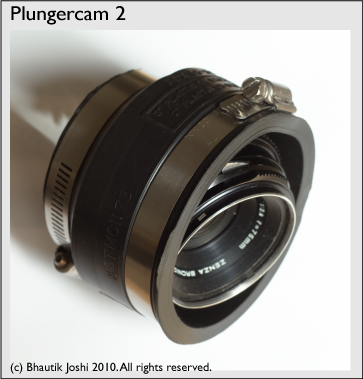
Plungercam 2 has much the same design as plungercam mini, except that it doesn't require lens disassembly. This is achieved by using a medium-format lens - in this case, a Zenza Bronica 75mm.
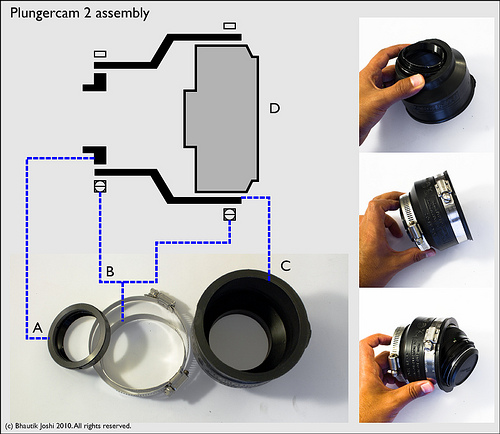
As shown in plungercam 2 assembly, above, there are only a few components required. A is a cheaply available t-mount (sturdier than a body cap, and capable of holding more weight, but doesn't allow the lens to get extremely close to the body) - about US$10 on eBay. B are a pair of 5cm (2 inch) and 8cm (3 inch) pipe clamps (US$2 each from a hardware store), C is a 5cm to 8cm (2 inch to 3 inch) pipe coupling and D is the lens itself.
The narrow end of the pipe coupling is first shortened to as short as is comfortably possible so it can still hold a pipe clamp around it. The t-mount is inserted into this narrow end (again, it should be a fairly tight fit), and the pipe clamps are placed on the narrow and wide ends of the coupling. The lens is inserted into coupling and the clamp is tightened to hold the lens in place. Note: a more practical alternative is to use a 8cm (3 inch) turnkey clamp on the wide end of the pipe coupling, but this is not demonstrated here.
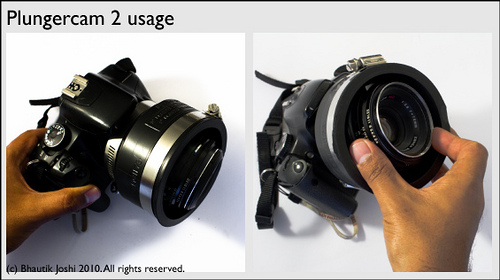
Shooting with Plungercam 2 is similar to plungercam mini; one hand holds the camera, and the other loosens the pipe clamp for the lens end and adjusts the lens position until the desired level of selective focus is achieved (see plungercam 2 usage above). Again, the lens can be fixed in position by adjusting the lens as needed and tightening the clamp, which is ideal, for example, for shooting tilt shift video.
Plugercam Classic
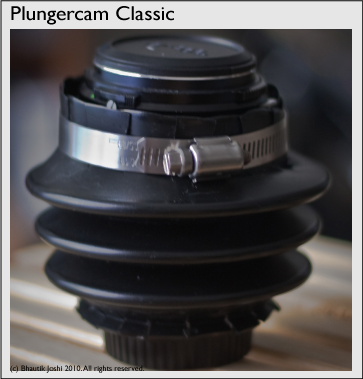
The whole plungercam series of lenses was originally inspired by a series of designs by Dennison Bertram and Keith Loh, from which I built the original Plungercam classic. Like bendycam, the advantage of this type of lens is that the shooting is purely free-form; because the springy bellow mechanism pushes back against the operators hand, each shot is more-or-less guaranteed to be unique.
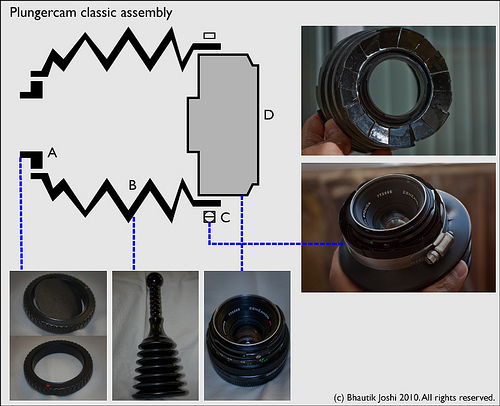
Like the other lenses, assembly is relatively simple. A is an EOS body cap that has had the centre drilled out, and this will be the attachment to the camera body. B is a rubberised toilet plunger (new - not used :P), C is a three-inch diameter standard pipe clamp and D is a used, Zenza bronica medium format lens ($12 from ebay!). I lopped the head and tail off the plunger; the smaller end had a diameter to match that of the body cap, and the larger end that of the lens. You can see where the male EOS adaptor was attached in the top right of this figure. I ended up needing to glue the adaptor into place to make a secure fit - standard PVC glue worked just fine.
Once the glue has dried (the longer you can leave this, the better - I gave it 12 hours), the lens slides into place on the wide end of the plunger and is held into place by the pipe clamp (bottom right of this figure). The plunger is relatively stiff, and I feel fairly confident that the lens mechanism holds up under its own weight without flopping about dangerously.
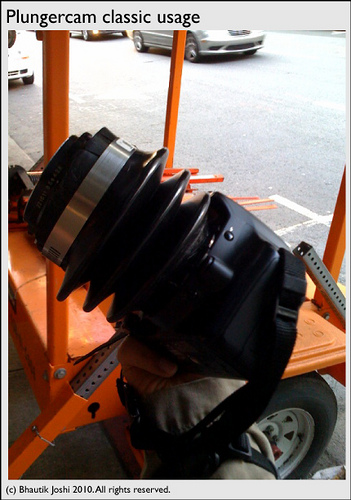
Using plungercam classic is a bit daunting, given the enormous size of the lens. I typically used it by holding the camera with both hands, and used my fingers wrapped around the pipe clamp to bend the plunger into place. The plunger provides a fair bit of resistance, so it's really only properly suited to shooting in well-lit scenarios where a relatively fast shutter speed can be used.
Other DIY types
You aren't limited to using old camera lenses. A number of people have successfully reused enlarger lenses to build custom tilt-shift lenses; some great examples can be found here, here and here. I prefer to use old lenses to save on cost, and also because I don't feel so bad if I damage them.